1. Packaging Overview
Aspen Systems’ customized rack crates are designed to allow a fully integrated rack to be safely shipped to your location. Racked clusters are normally shipped as single racks, which are re-assembled into a functioning cluster at the customers’ site.
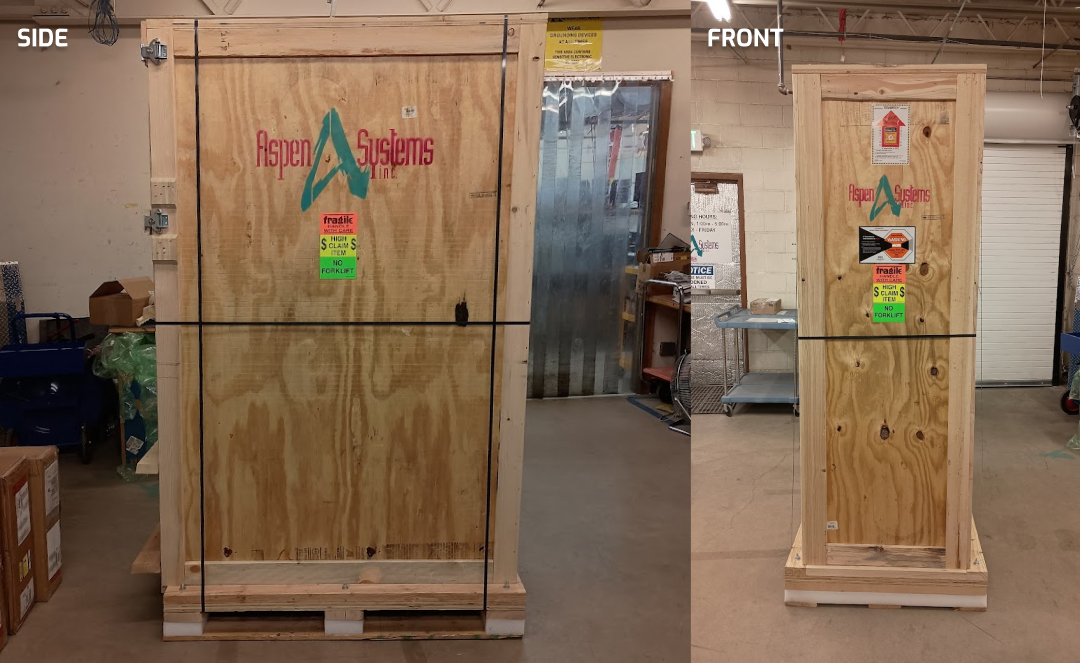
- Each rack is enclosed in a crate, latched, and banded for transport.
- Accessories for your order are included in boxes that are inside the rack or shipped separately, depending on how much room is in the rack or how many accessories there are.
2. Inspection
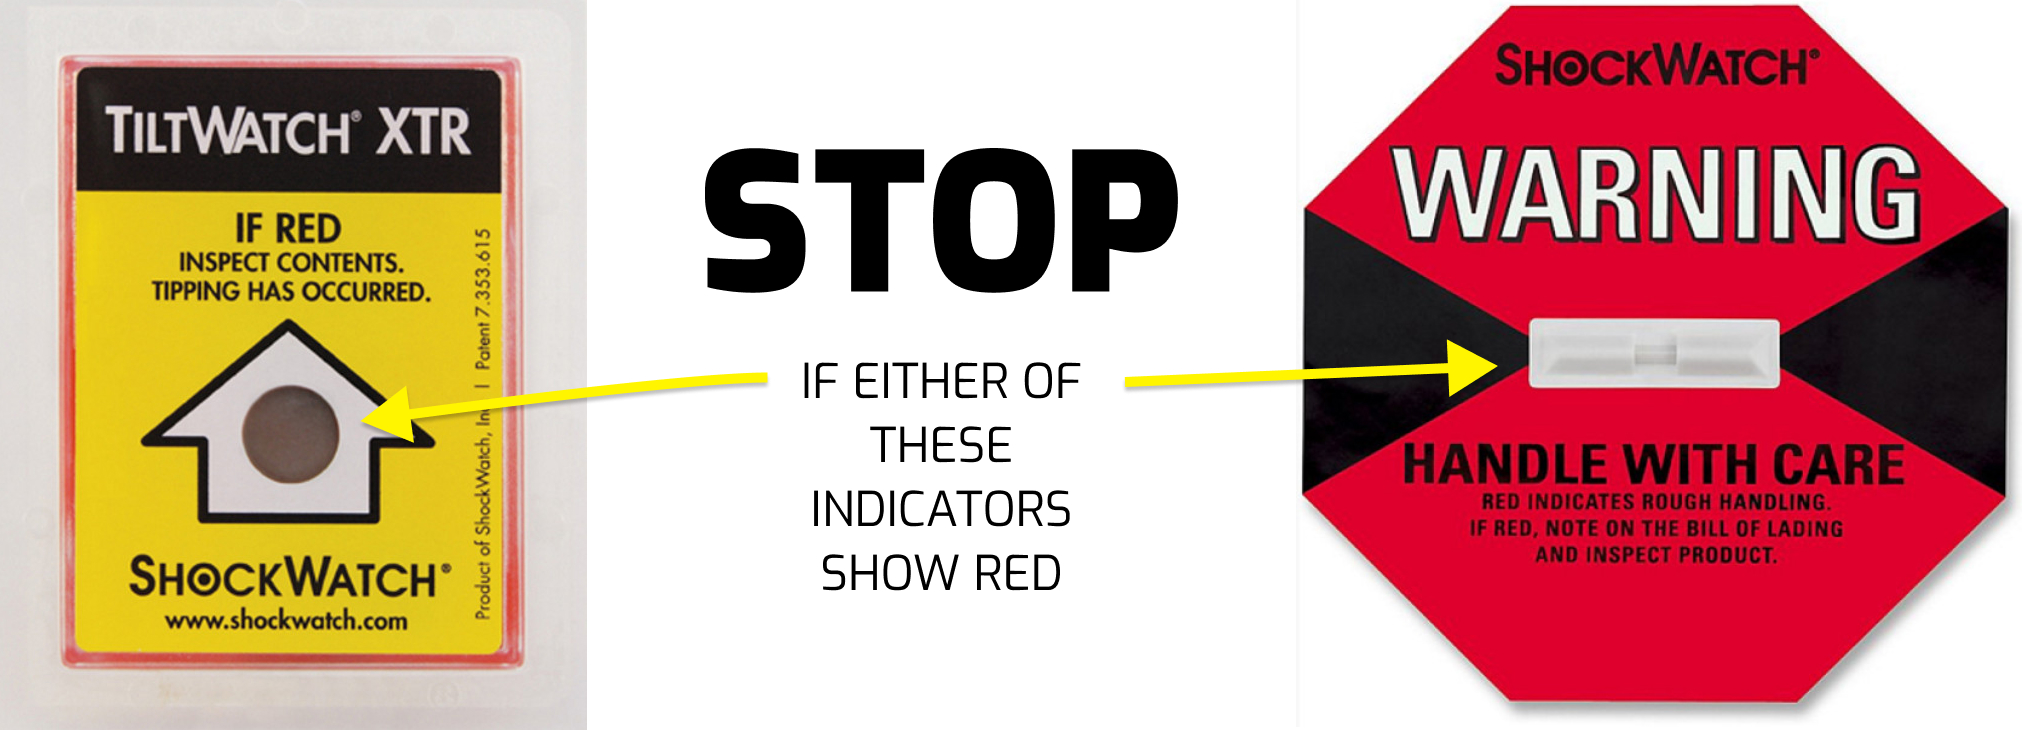
Before attempting to unload your rack, and while the delivery company is still at your location, carefully inspect the shipping crate for signs of visible damage. All Aspen Systems shipments are equipped with “ShockWatch ©” and “TiltWatch ©” indicators which turn red if excessive shaking or tilting have occurred during transit. If either of these indicators show red, or if you notice visible signs of damage on your crate, complete all steps in section 2.1 below.
2.1 Report Your Shipment as Damaged
- On your receiving form, place a checkmark in the box labeled “Damaged in Transit”.
- Also, make a note in the “Comments” section of the form that your shipment is damaged.
- Mention the damage to the delivery person and ask them to immediately contact their dispatcher to inform them your shipment was received damaged.
- Take photographs of the external shipping containers and damaged areas before unpacking the system for further inspection.
- Notify your Aspen Systems Sales Representative or email sales@aspsys.com with photos and details of the damage.
3. Unpacking Your Cluster
Please follow the following procedures to unpack your cluster properly:
3.1 Tools Required
- 3-4 people
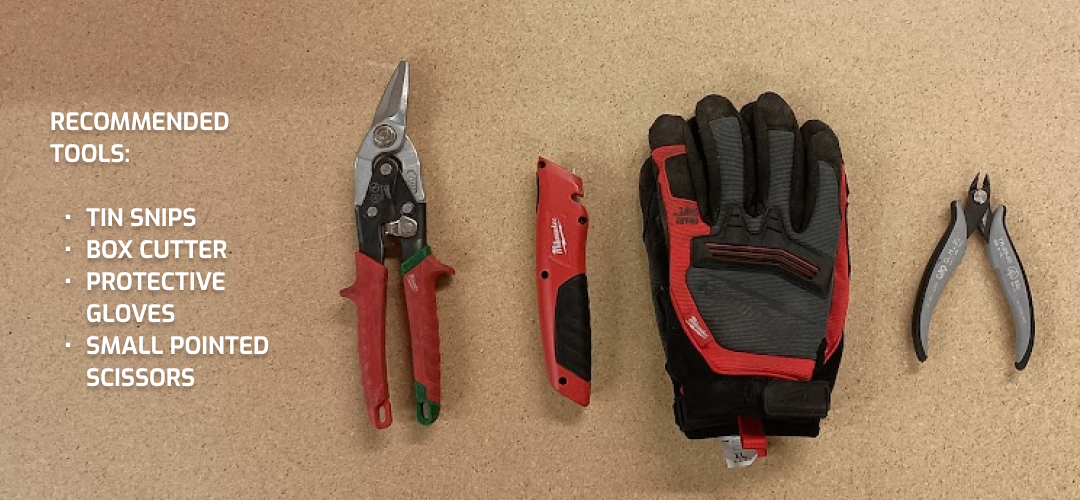
- Micro wire cutters, dykes, snips, or a box cutter
- Protective Gloves
3.2 Remove from Crate
- First, ensure your unloading facility has proper clearance. Crates are 56”x29”x87” and are around 90”-92” high when a pallet jack is used.
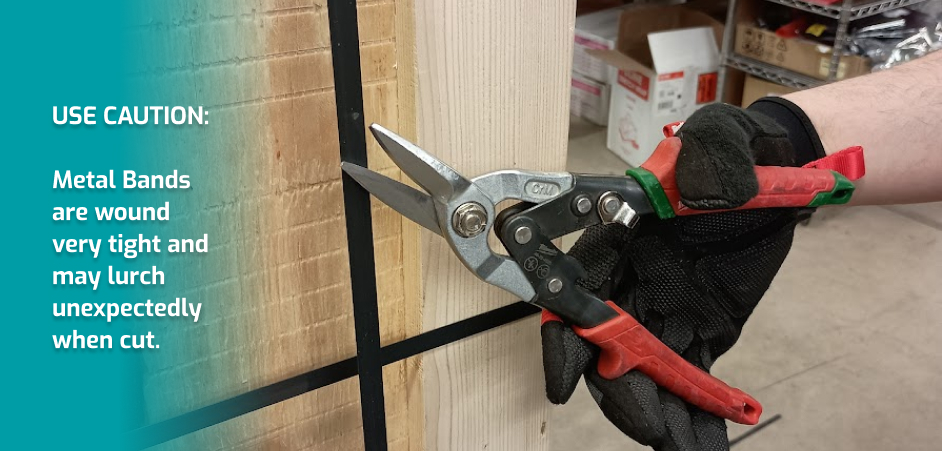
- All Aspen Rack shipping crates arrive on pallets and are metal banded for security. Remove these metal bands using tin snips or side cutters to cut the bands.
CAUTION: Be sure to safely contain both ends of each band as they are being cut or twisted. The bands have sharp edges and should be handled carefully. Gloves or other protective gear is recommended.
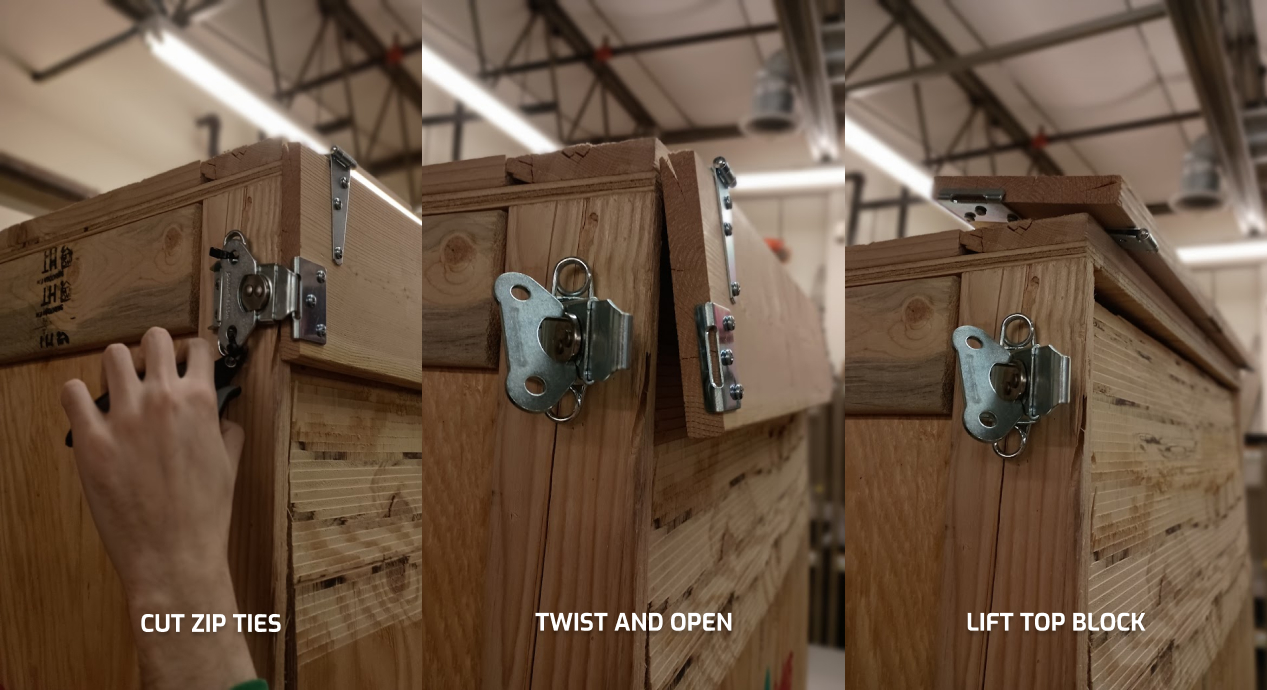
- Cut the zip ties on each twist lock and turn the lock counterclockwise until you can release the latch
- Once the top two latches are free, lift the top-hinged block so it swivels upwards and over to rest on top of the crate.
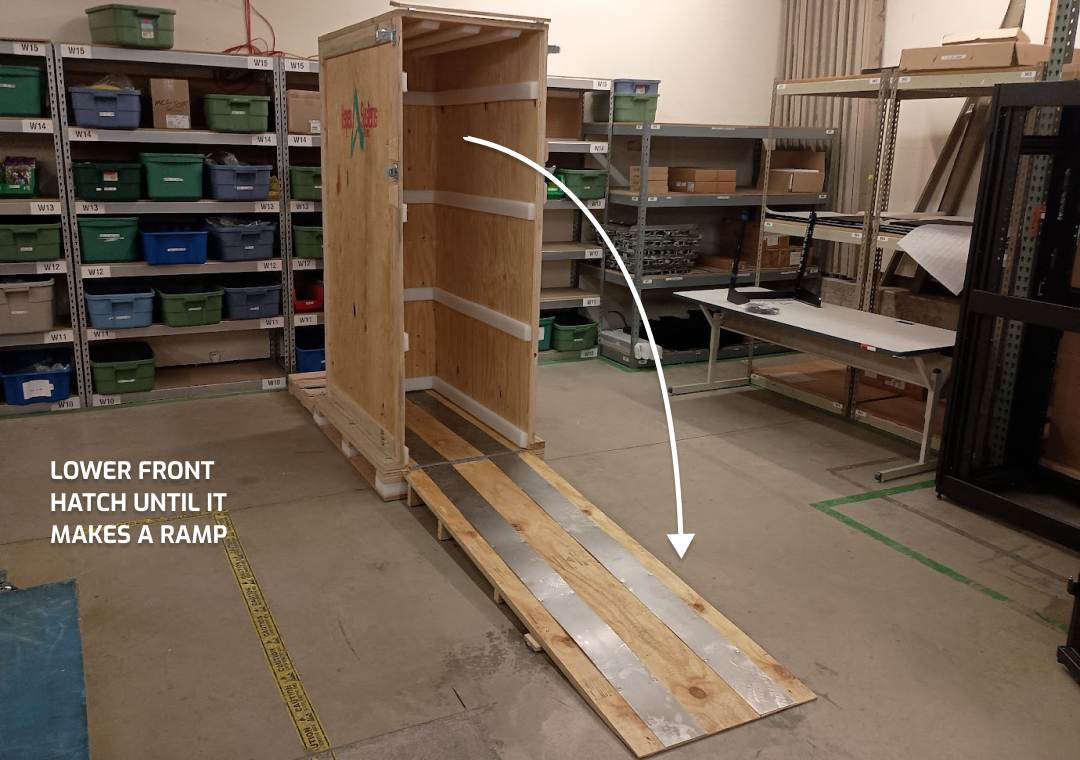
- Carefully lower the front door until it lies level on the floor, making a ramp.
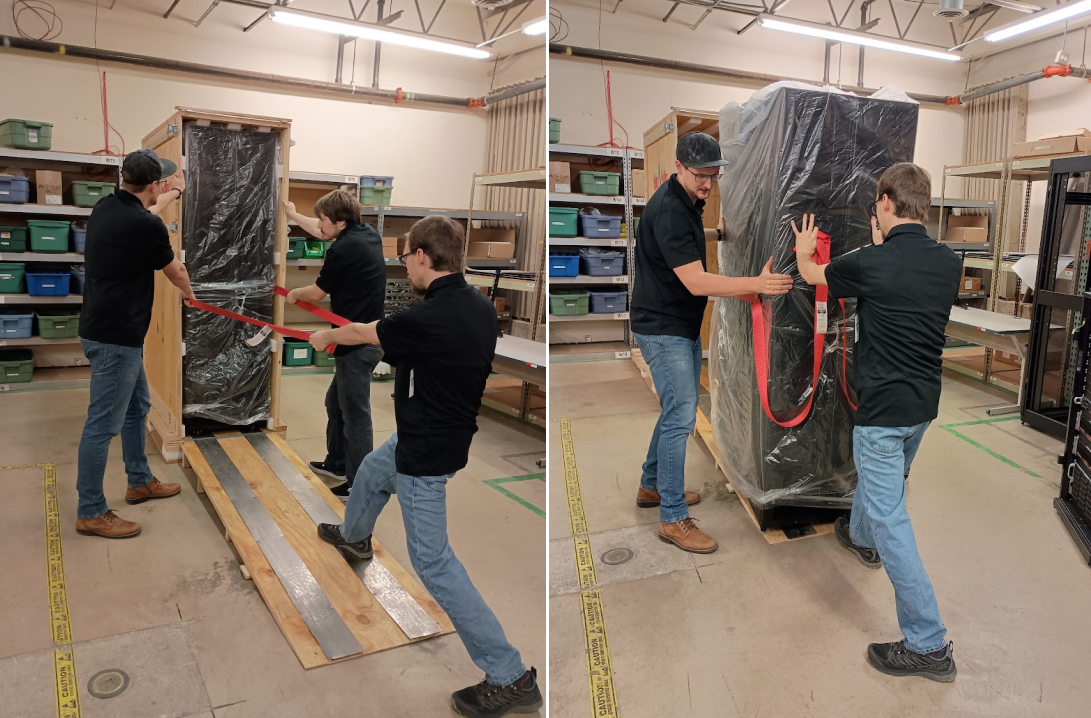
- Remove tape from the tow straps secured to the rack and pull on them to take the rack out of the crate. Multiple people are advised to help with this. One person on each side to help guide the rack straight down the ramp, one or two pulling on the tow straps, and another to prevent the rack from going down the ramp too quickly.
CAUTION: Densely populated racks can be over 2,000 pounds. Never attempt to move a rack alone.
- Remove the protective plastic bag that covers your rack by pulling it up and over the top of the rack.
- Once out of the crate, you are ready to roll the rack to the final installation site.
4. Moving Your Cluster
All Aspen Clusters are delivered on casters. They are easily wheeled from one location to another.
Before moving your cluster:
- Disconnect all cables, and carefully note the position and connections of all installed components to ensure correct reinstallation.
- Remove as much equipment from the rack as possible to reduce the weight if needed.
- The standard Aspen rack is 6’ 7” tall. Walk the pathway from your unloading area to the installation site to ensure you have adequate clearance through all doorways and hallways between the unloading area and the final destination. Please check for obstacles, such as door jams and automatic door mechanisms, which might cause clearance issues.
- If your facility does not have adequate overhead clearance to roll the rack to its final installation location, systems can be removed from the rack so that it can be tilted, or special dollies can be used to tilt the rack while it is being transported.
- If installing your new system on a raised floor, place cut-out tiles at the proper location to allow access to under-floor power and network connections.
- If your order only contains a single rack, only power and network connections are needed to bring your cluster to full operation.
- If your order contains multiple racks, the racks are integrated with formed bundles of network connectors running between the racks, which allow for ease of installation.
CAUTION: Racks are very heavy. Never tip or lift a rack alone. You could seriously injure yourself and destroy the equipment. If you must tip a rack, you need at least four people to accomplish this safely.
Aspen Systems typically ships clusters that are already fully installed in the racks. In this instance, you will simply need to connect all loose cables to complete cluster installation.
- To ensure safe shipping and prevent possible damage to your cluster, some cables will arrive to you disconnected and bundled.
- Use scissors or zip tie cutters to remove the zip ties that bundle the cables, being careful not to cut the actual cables.
- Look for any other cables that may come loose during transit and reconnect them appropriately.
Need Assistance?
If you encounter any issues with the steps on this page, please contact your Aspen Systems sales representative. We are always happy to provide additional support.
Thank you for doing business with us, and we look forward to working together in the future.
 Cooling